SelectJet Imagesetter Positive Logo Positivity Tutorials
Vectorising a Logo in CorelDraw
SelectJet Image Setter
 
Positivity home page
SelectJet & CopyJet imagesetter systems
Wasatch SoftRIP software
SelectJet & Copyjet Screen Films
xd imagesetting systems
Imagesetting resources
FAQs on imagesetting systems
Recommendations From Clients
Colour Management
Positivity Contact Details


Preparing a TIFF Drawing for Screenprinting in CorelDraw

I'm often asked how to prepare artwork for printing. Typically a designer provides a piece of artwork that looks great on their monitor but is nowhere near suitable for printing.
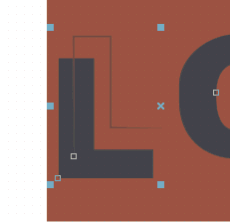
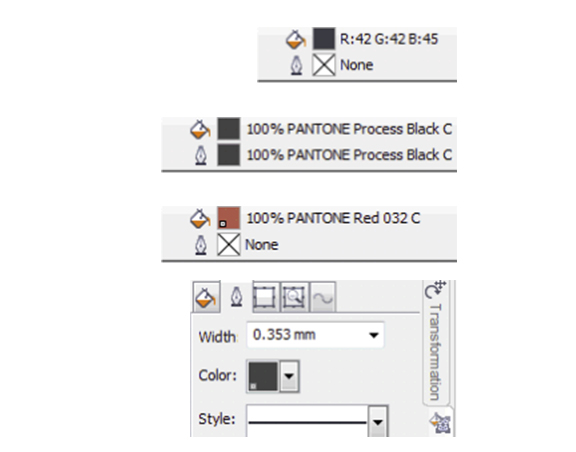
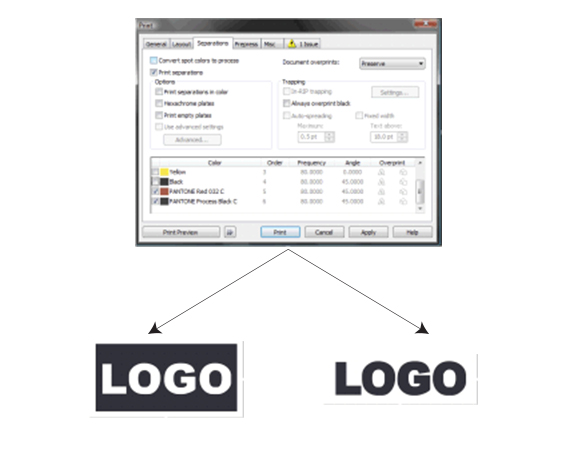
Below is a very simple logo which I'd want to print as a two-colour job, a black and a brown. It's been supplied as a tiff file in RGB, I don't want to print as a four colour job.

Original Logo as supplied for printing
The tutorial is done in Corel X4 but the principles are the same for all versions.
The menu positions may have changed between versions.

Go to Bitmaps on the top menu and choose Quick Trace (for more complicated artwork Outline Trace can be chosen, it has more options)
This converts the raster image to vectors. It is very important to start with a reasonably high resolution image, otherwise the vector outlines become jagged and hard to follow.

Vectorised Logo

The programme has converted to vectors but has picked up some aliasing in the image as a separate object so I'm going to delete that. the rest of the image is quite clean but is still in RGB colours, I need to convert to spot colours to allow separation.

RGB Colour settings

Go to Window>Color Palettes and tick the Pantone Solid Coated palette. It will appear on the RHS of your workspace.
Highlight the black objects (this can be done by Edit>Find & Replace) and both Right & Left click on the Pantone Black swatch.

Pantone colour selected

Change the background colour to a Pantone as well. Because the plates will be separated into solid blacks it doesn't actually matter what colour you choose, it's often better to choose a contrasting colour rather than a similar one because you can see the objects that you have missed.

BG Pantone colour

Next, give the black objects an outline.
We want a little trapping to compensate for any errors during the printing process and we are going to achieve that by overprinting the outline.
Alt + Enter brings up the Object Properties Box, set an outline width.

Corel Object Properties

Right click on the object and tick the Overprint Outline option.
If you go to the View menu you can choose the 'Enhanced with Overprints' option, this will allow the overprints to be seen.

Enhanced Views With Overprint

Go to Print, choose your printer and go to the separations tab.
Tick 'Print Separations' and you should be looking at something like this:

Separations dialogue box corel

Print and expose.

Pantone Black Separation# Pantone Warm Red 032
Other Tutorials
Positivity

Convert a Logo for Screenprinting Corel X4

Simple Exposure Calculation

What is an ICC Profile?

Corel PowerClip

Exposure Problems - details

 
Wasatch Tutorials
and Videos

Spot Colour Replacement

Colour Atlas Generation

Dynamic Layout

Variable Data

RIP Queues

Wasatch ImageNet

Cost Estimation

'Popping' Colour 1

'Popping' Colour 2

Wasatch Port Redirector

Print From a Mac

Hot Folders

Templates


Positivity Contact Details 01793 686 380
Home | Imagesetters | Films | RIP | Clearance | Resources | Feedback | FAQs | Colour | Contact